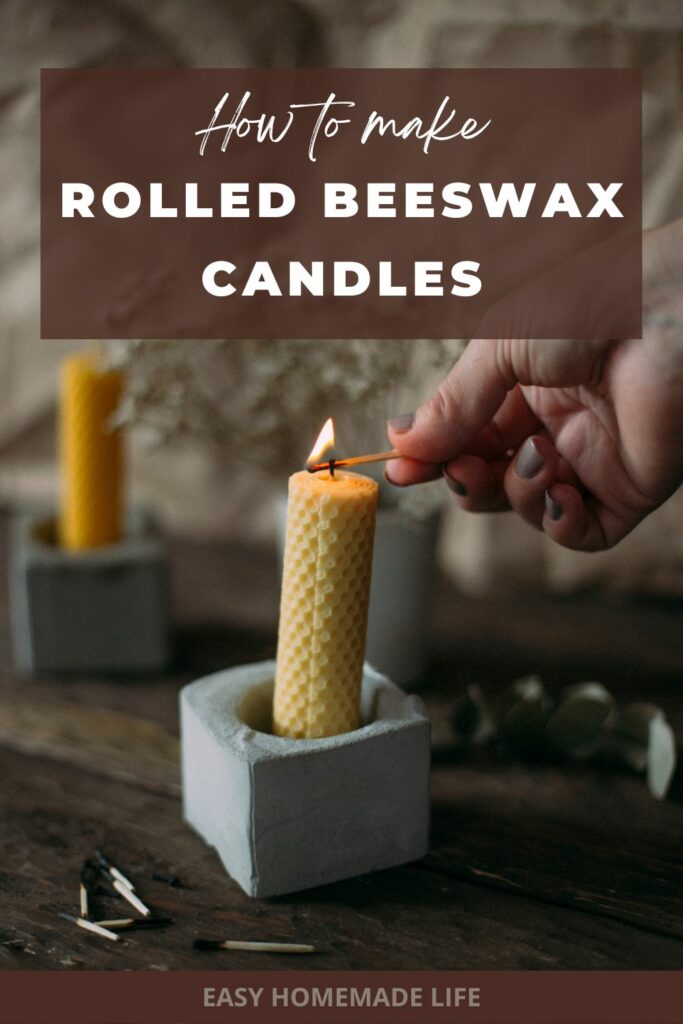
Rolled Beeswax Candles Recipe
As a participant in the Amazon Services LLC Associates Program and other affiliate programs, Easy Homemade Life may collect a share of sales or other compensation from the links on this page. This comes at no additional cost to you, and all the prices and availability are accurate at the time of publishing.

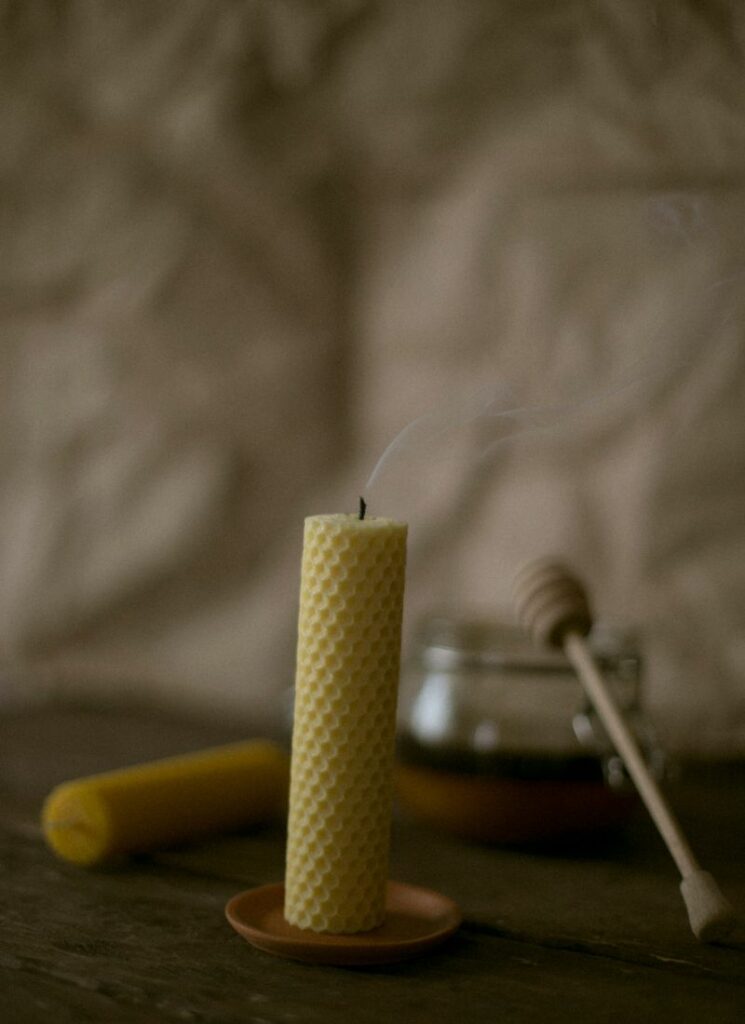
Rolled beeswax candles have an eye-catching honeycomb texture, natural yellow color, and pleasant honey scent. These candles fit in any regular taper candle holder and burn for hours with a deep golden glow that add cheer to any space. All you need are a few sheets of beeswax and a wick, then you can make the easiest homemade candles for home decor or gift giving.
Easy DIY Beeswax Candles at Home
Rolled beeswax candles are the easiest homemade candles and I even make them with my kids! This is one of their favorite DIY activities, along with making bath confetti. This project also lets you avoid dealing with hot wax and dipping candles. No need to hang anything or worry about setting the wick exactly in the center.
Plus, rolled beeswax candles are infinitely useful. You can use them as natural home decor and display them on the dining table or entryway. They also make great DIY candles for your next birthday cake.
I even use these to find drafts in our home during winter, sort of like a DIY home energy audit, which is one of the best heating tips I’ve learned! Furthermore, I think one is a stunning prayer candle because only the best should be offered to God. What would make a better offering than a pure beeswax candle with a cotton wick?
How to Make Honeycomb Beeswax Candles
The best part about the rolled approach to homemade long taper candles is that it avoids a big mess. Since all we do is roll the wax around a wick, we don’t need special equipment. Nor do we need to turn on the stove because there’s nothing to melt. That means you can do this project any time you like even in the summer heat.
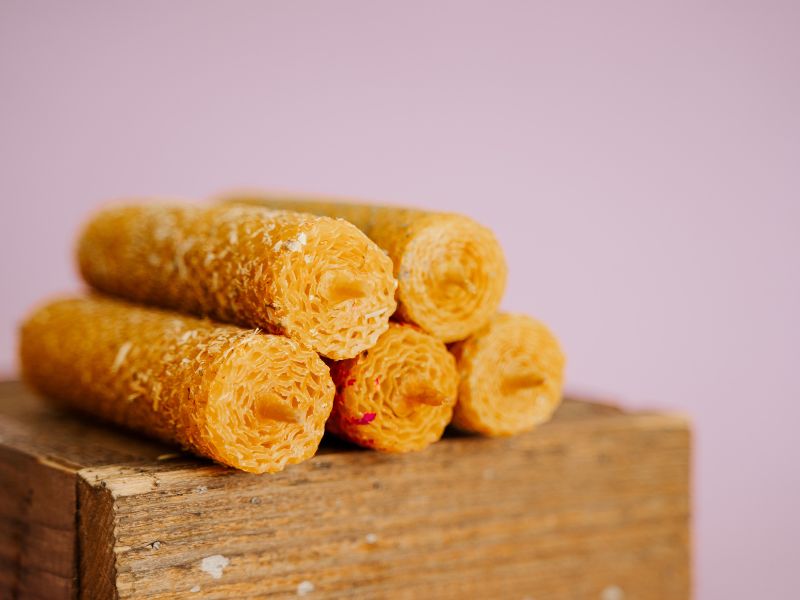
In addition to being mess-free making this type of beeswax candle at home is quick. Once you get the hang of it, you can make a pair in 5 minutes or less. Create different sizes for small and short tea lights, thin birthday candles, or large pillar candles, depending on how you cut the initial sheet of wax and how many times you roll it.
Use hand-rolled candles immediately or store them for the holidays. Rolled candles make an elegant home decor for any season and bring a special warmth to any dark winter night. Not to mention, they make gorgeous gifts for Mother’s Day, Christmas, and other special occasions! Wrap a bunch with ribbon, burlap, lace, or twine and share with your loved ones.
Let’s learn how to make rolled candles with beeswax and create beautiful taper candles at home!
Ingredients
You only need two ingredients for one pair of 8-inch candles: a sheet of honeycomb beeswax and wick.
- 1 16 ¼ x 8 ½-inch sheet of honeycomb beeswax
- 17 inches cotton square braid wick #1/0
- Or a candle making kit
Buy honeycomb sheets from a bee supply store, craft store, or order online. Ask for “foundation comb for beehives” if you go to a bee supply store. These come in a standard 16 ¼ x 8 ½ inch rectangle, usually in a pack of ten. Beekeepers typically use the sheet comb as a shortcut to help the bees make honey faster. Instead of making the foundation from scratch, the bees can immediately start filling it with pollen.
Otherwise, searching for “honeycomb beeswax sheets” should get you what you’re looking for. You might see beeswax sheets in various colors. Pick your favorite! Any color will work well for this project.
Likewise, candle wick is available at craft stores and online. You can buy the materials separately as I linked above or together in a candle-making kit from ETSY. The kit comes nicely packaged and has everything you need for 12 candles.
Step-By-Step Directions
Now, let’s discuss how to make candles with beeswax sheets.
Start by clearing out your workspace. Make sure the countertop is clean and there aren’t any crumbs or dog hair around because they are sure to stick to the wax. It’s good to cover the counter with a plastic placemat or tray if you’re working with dyed wax sheets. This will protect the surface from accidentally absorbing any color that rubs off.
Use a ruler to measure the sheet and serve as a straight edge as you cut it in half with a pair of sharp scissors or a knife. Each piece will be 8 ⅛ x 8 ½ inches.
Fold the wick in half and cut it into two parts, each being 8 ½ inches long. Now, roll it up!
How to Roll Beeswax Candles
You’ll want to warm the sheets up slightly if they are not already fairly flexible. Placing them in front of a sunny window or blowing with a hair dryer or heat gun for a few seconds will be enough.
Cold wax can crack and break as you roll, ruining the candle. Please note that you don’t want to overheat the wax because it can melt. Wax at the correct temperature will be pliable but not too soft and smoosh under your fingers.
Lay the candle wick at the very edge along the one side of the wax. Match the bottom of the wick to the bottom edge of the sheet. ½-inch will poke out above the top edge; this is the part of the finished candle you will light and burn.
Secure the wick by pressing it gently into the slightly warm beeswax sheet and tightly fold the sheet over once. This holds the wick in place, now all you need to do is roll.
Keep your coil as tight and even as possible, rolling from one side to the other. The tighter the roll, the better it burns. Give a quick blow with a hair dryer when 1 inch of the sheet remains, then finish rolling and seal the seam by pressing into the candle. If the weather is already warm, pressing or rubbing just with your fingers may be enough.
Repeat the process until you’ve made as many beautiful honeycomb beeswax candles as you want. Don’t worry, it’s easy to clean candle wax off a carpet.
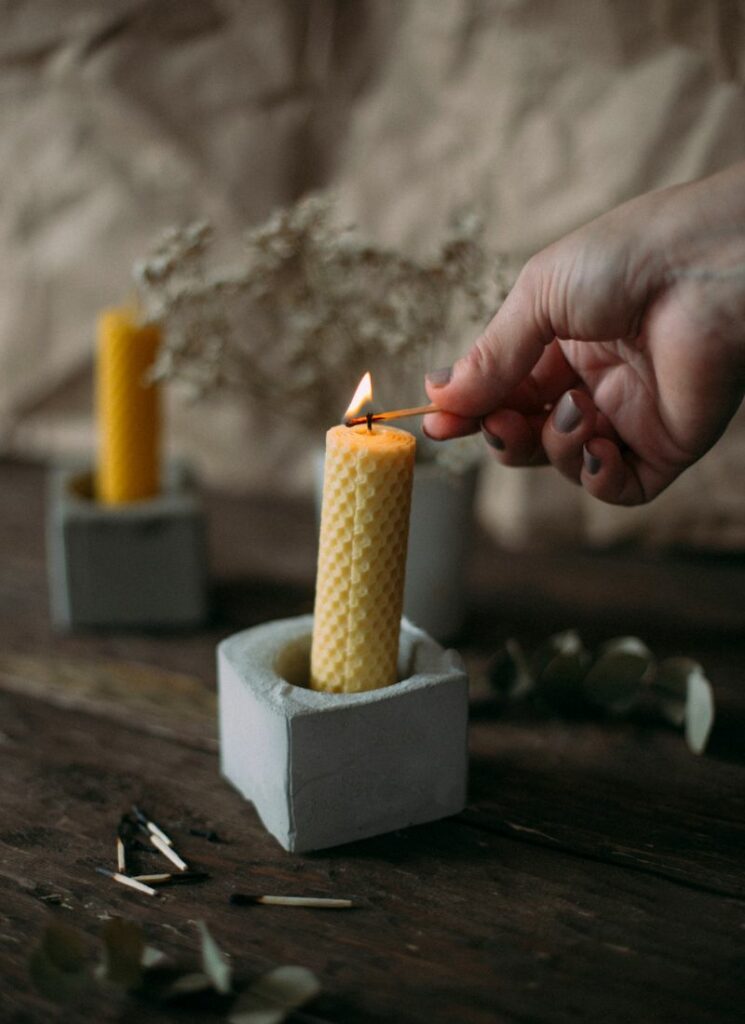
Trim the wick to ¼ inch and insert it into your favorite candle holder. Use proper caution and burn in an open location away from small children and curtains! Never leave a candle unattended.
Hand Rolled Beeswax Candles FAQ
I understand you might have some questions, particularly if homemade candles are new to you or you’ve never worked with beeswax sheets for candles before. Let me answer some common queries and clarify the process for you.
Since beeswax is such a hard wax, it burns slowly. Some say 3-5 times slower than soy or palm wax. Overall burning time depends on the size and shape of the candle. Rolled candles will burn for about 6 hours, maybe even longer, if you take extra care to roll the candle as tight as possible. The tighter the roll, the longer the burn.
Beeswax candles are completely safe for home use. They are made with all-natural wax and wicks, which means there is no toxic exposure or environmental damage. Pure beeswax candles are also naturally smokeless (therefore soot-free), biodegradable, and don’t have chemical colorants or fragrances.
In addition to being a safe, non-toxic choice, beeswax candles act as a natural air purifier and can help improve the air quality. Negative ions release into the air as beeswax candles burn and attach to positive ions (dust, pollen, mold, orders, etc.) to effectively neutralize them. Many electric air purifiers work on the same principles.
These are relaxing to place in the bathroom while you soak in a bubble bath and beautiful enough to display as a centerpiece for Mother’s Day dinner.
More Easy Home Decor Ideas

Easy Rolled Beeswax Candles Recipe
Equipment
- 1 Ruler or measuring tape
- 1 Scissors
- 1 Blow dryer or heat gun
Materials
- 1 sheet 16 ¼ x 8 ½-inch of honeycomb beeswax
- 17 inches cotton square braid wick #1/0
Instructions
- Use a ruler to measure the sheet and serve as a straight edge as you cut it in half with a pair of sharp scissors or a knife. Each piece will be 8 ⅛ x 8 ½ inches.
- Fold the wick in half and cut it into two parts, each being 8 ½ inches long.
- Lay the candle wick at the very edge along the one side of the wax. Match the bottom of the wick to the bottom edge of the sheet. ½-inch will poke out above the top edge; this is the part of the finished candle you will light and burn.
- Secure the wick by pressing it gently into the slightly warm beeswax sheet and tightly fold the sheet over once.
- Keep your coil as tight and even as possible, rolling from one side to the other. The tighter the roll, the better it burns. Give a quick blow with a hair dryer when 1 inch of the sheet remains, then finish rolling and seal the seam by pressing into the candle. If the weather is already warm, pressing or rubbing just with your fingers may be enough to seal the edge.
- Trim the wick to ¼ inch and insert it into your favorite taper candle holder. Use proper caution and burn in an open location away from small children and curtains! Never leave a candle unattended.
Notes
References: