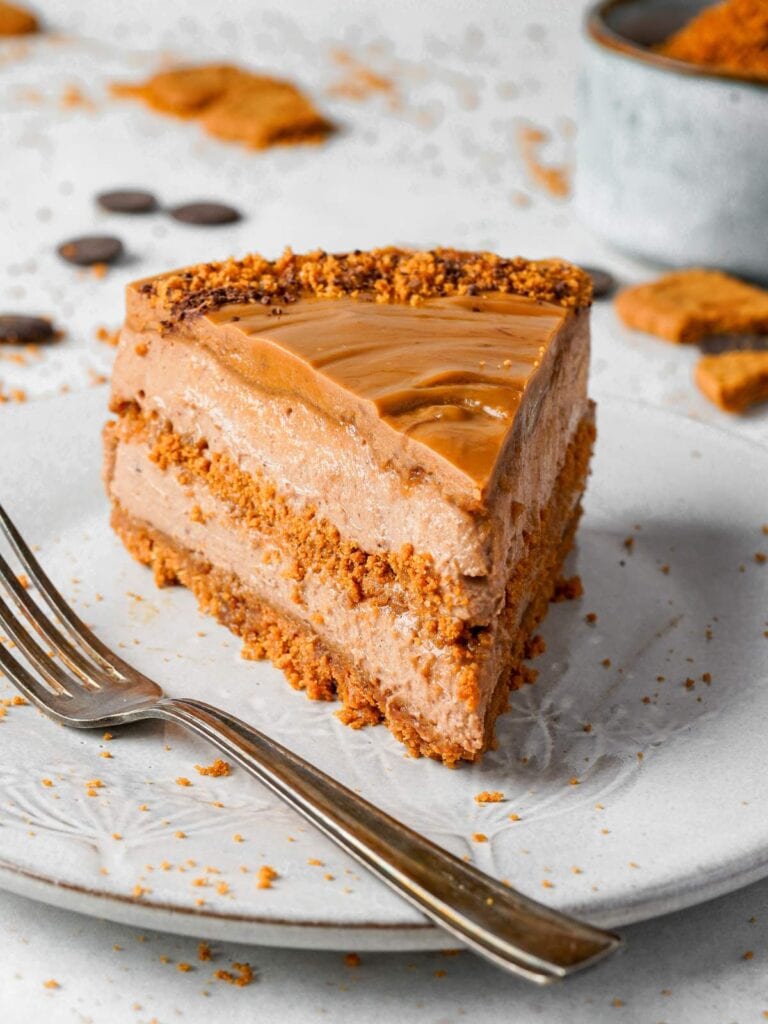
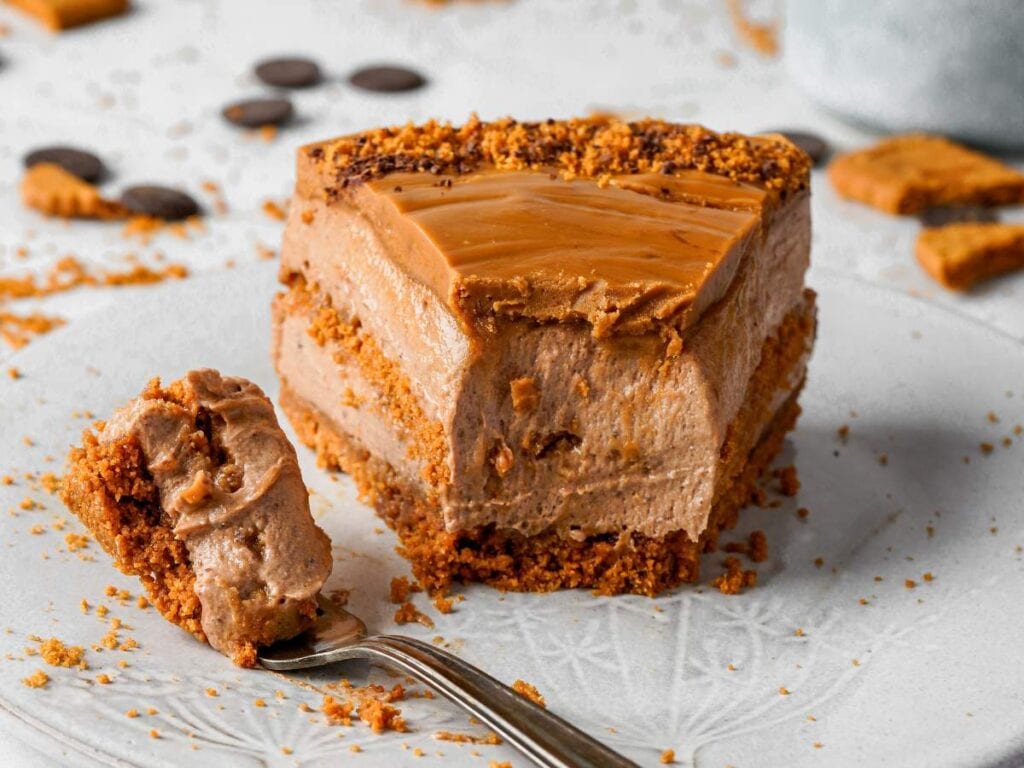
No-Bake Biscoff Cheesecake
As a participant in the Amazon Services LLC Associates Program and other affiliate programs, Easy Homemade Life may collect a share of sales or other compensation from the links on this page. This comes at no additional cost to you, and all the prices and availability are accurate at the time of publishing.

I hadn’t planned on falling for Biscoff. A friend showed up to a girls’ day with a jar of it and no real plan for what we’d do with it, so we just grabbed spoons and went straight in. Warm, spiced, somewhere between a cookie and a caramel you can’t quite place. That was enough. It’s been a fixture in my pantry ever since, and this Biscoff cheesecake is what happens when you start taking it seriously.
This is the one I make when I want something that looks like it took all day but actually just took a fridge. The crust comes together in minutes, the filling whips up just as fast, and then it’s hands off until it’s time to slice. We’re a no-bake household when the holidays get busy, which is also why my apricot cheesecake shows up on the table almost as often as this one. I’ve started keeping a jar of Biscoff on hand year round now, the same way I do with vanilla or cinnamon, just in case the craving hits before the next holiday does.
This is the first of several Biscoff recipes finding their way onto the blog, so consider this your proper introduction. If this is the cheesecake that convinces you to keep making your own, my no-crust cheesecake is worth trying next for the nights you’re fine turning the oven on and want that same crowd-pleasing payoff.
How to Make Biscoff Cheesecake
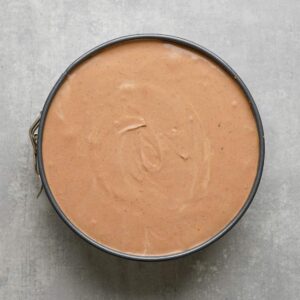
No-bake Biscoff cheesecake comes together in about 30 minutes of active work: pressing the crust, mixing the filling, and layering everything into the pan. The long chill afterward is the part that actually does the work, so resist the urge to shortcut it. Six hours is the minimum for the filling to set firm enough to slice cleanly, but overnight gives the Biscoff flavor more time to settle through the whole filling instead of just sitting on top of it.
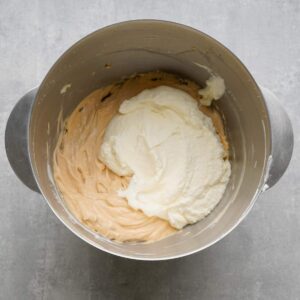
The one step that makes or breaks the texture is how you whip the cream. Stop at soft peaks, where it holds its shape but still looks slightly glossy, not stiff or dry. Whipped past that point, the filling turns dense and a little grainy once it’s folded together and chilled, instead of staying light and sliceable. If you’re not sure, err on the side of underwhipping. Soft peaks that look almost not-quite-done are exactly where you want to be.
Don’t worry about the filling looking thinner than you expect right after folding. It firms up significantly in the fridge, so a softer consistency going into the pan is normal, not a sign something went wrong.
Scroll down for the full printable recipe card with exact ingredients, measurements, and instructions.
Ingredient Notes
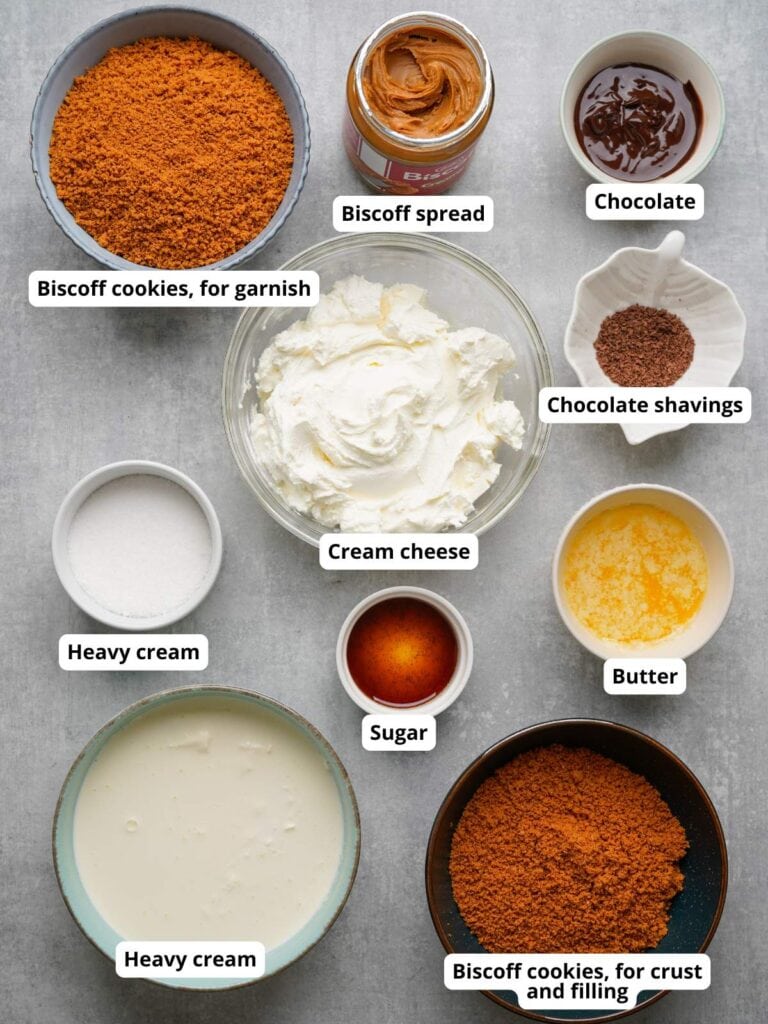
Biscoff cookies: Used both crushed into the crust and layered whole-crushed inside the filling, so one box does double duty. No baking or special prep required beyond crushing.
Cream cheese: Use full-fat for the right texture and flavor. Let it soften completely at room temperature first. Cold cream cheese leaves lumps in the filling that won’t smooth out once the whipped cream is folded in.
Biscoff spread: The ingredient doing the real flavor work here. Look for it near the peanut butter or international foods section if your store doesn’t shelve it with the cookies.
Heavy cream: Keep it cold right up until you whip it. Cold cream whips faster and holds its peaks longer, which matters for the filling’s final texture.
Dark chocolate chips: Optional. Skip for a cleaner, more pronounced Biscoff flavor, or fold in for a chocolate version. Melt gently so it stays pourable when you fold it into the filling.
Step-By-Step Instructions
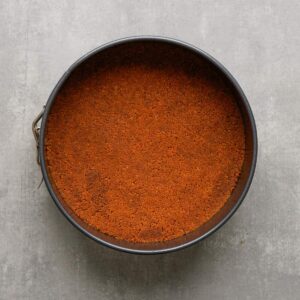
- Make the crust with cookies and butter.
- Press into the pan, then transfer to the fridge.
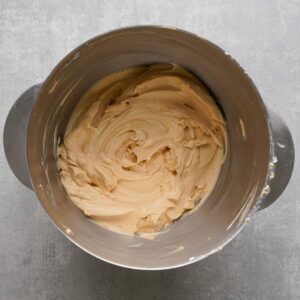
- Beat the base.
- Whip the cold heavy cream to soft peaks. Fold it gently into the cream cheese mixture. Add melted chocolate now if using.
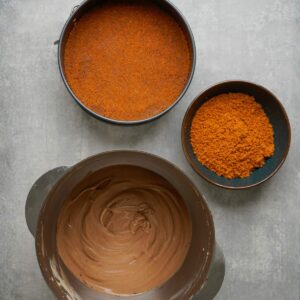
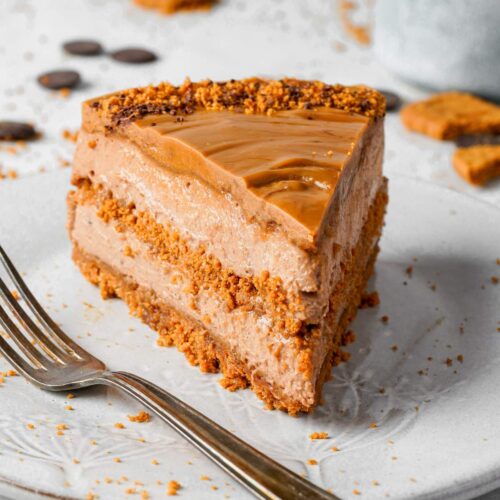
- Assemble into layers.
- Refrigerate at least 6 hours, or overnight.
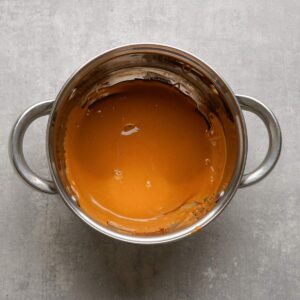
- Make the topping on the stove.
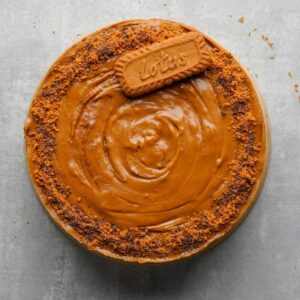
- Garnish and serve.
Substitutions and Variations
- Heavy cream: Whipping cream or double cream both work in place of heavy cream, in the filling and the topping.
- Dark chocolate chips: Swap in milk or white chocolate for a sweeter filling, or skip the chocolate altogether for a pure Biscoff flavor.
Jessica’s Tips
- Press the crust firmly using the bottom of a measuring cup instead of just the back of a spoon. A loosely packed crust crumbles apart the second you cut into it, instead of holding its shape as a clean base.
- Chill your mixing bowl and beaters for about 10 minutes before you whip the cream. Cold equipment speeds up the whip and helps the cream hold its structure once it’s folded into the filling.
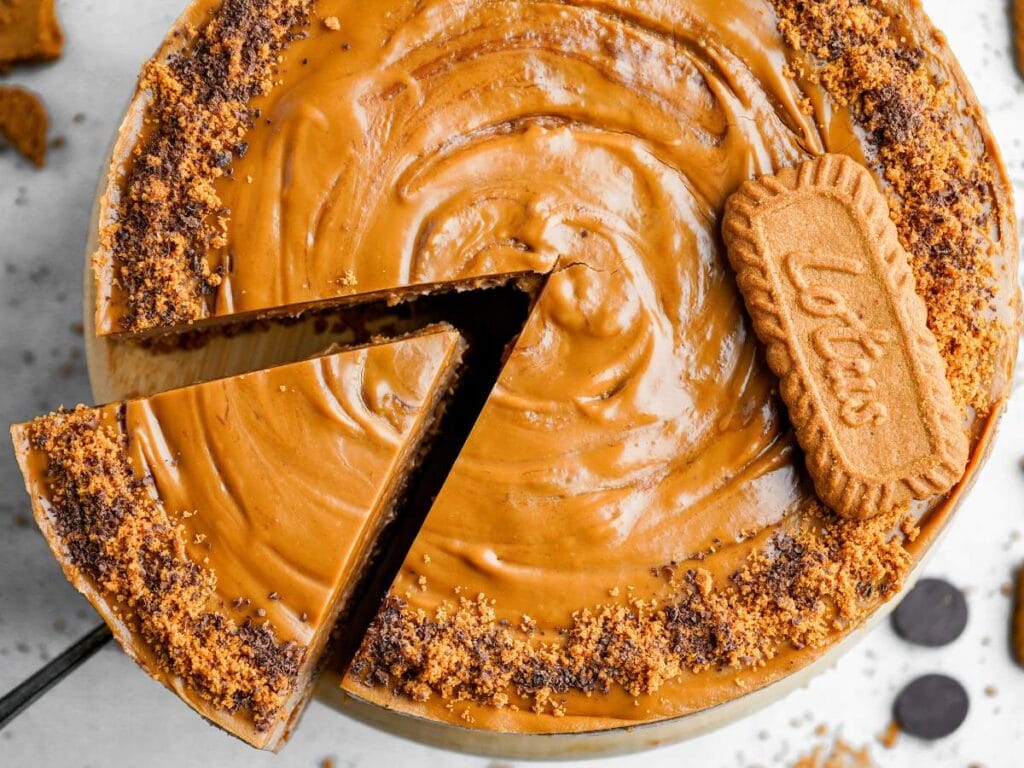
- Hold off on the cookie crumb and chocolate shaving garnish until right before you serve. Add it too early and the moisture in the cheesecake softens the crumbs instead of leaving them crisp.
Storage & Freezing Tips
Keep the cheesecake covered in the fridge for up to 4–5 days, either in the springform pan wrapped in plastic, or sliced into an airtight container. If you’re making it ahead, leave the cookie garnish off until just before serving so it stays crunchy.
To freeze, wrap the cheesecake (without topping because the texture won’t be the same after thawing) in plastic, then foil, and freeze up to 1 month. Thaw overnight in the fridge, then add the topping and garnish right before serving.
How to Serve Biscoff Cheesecake
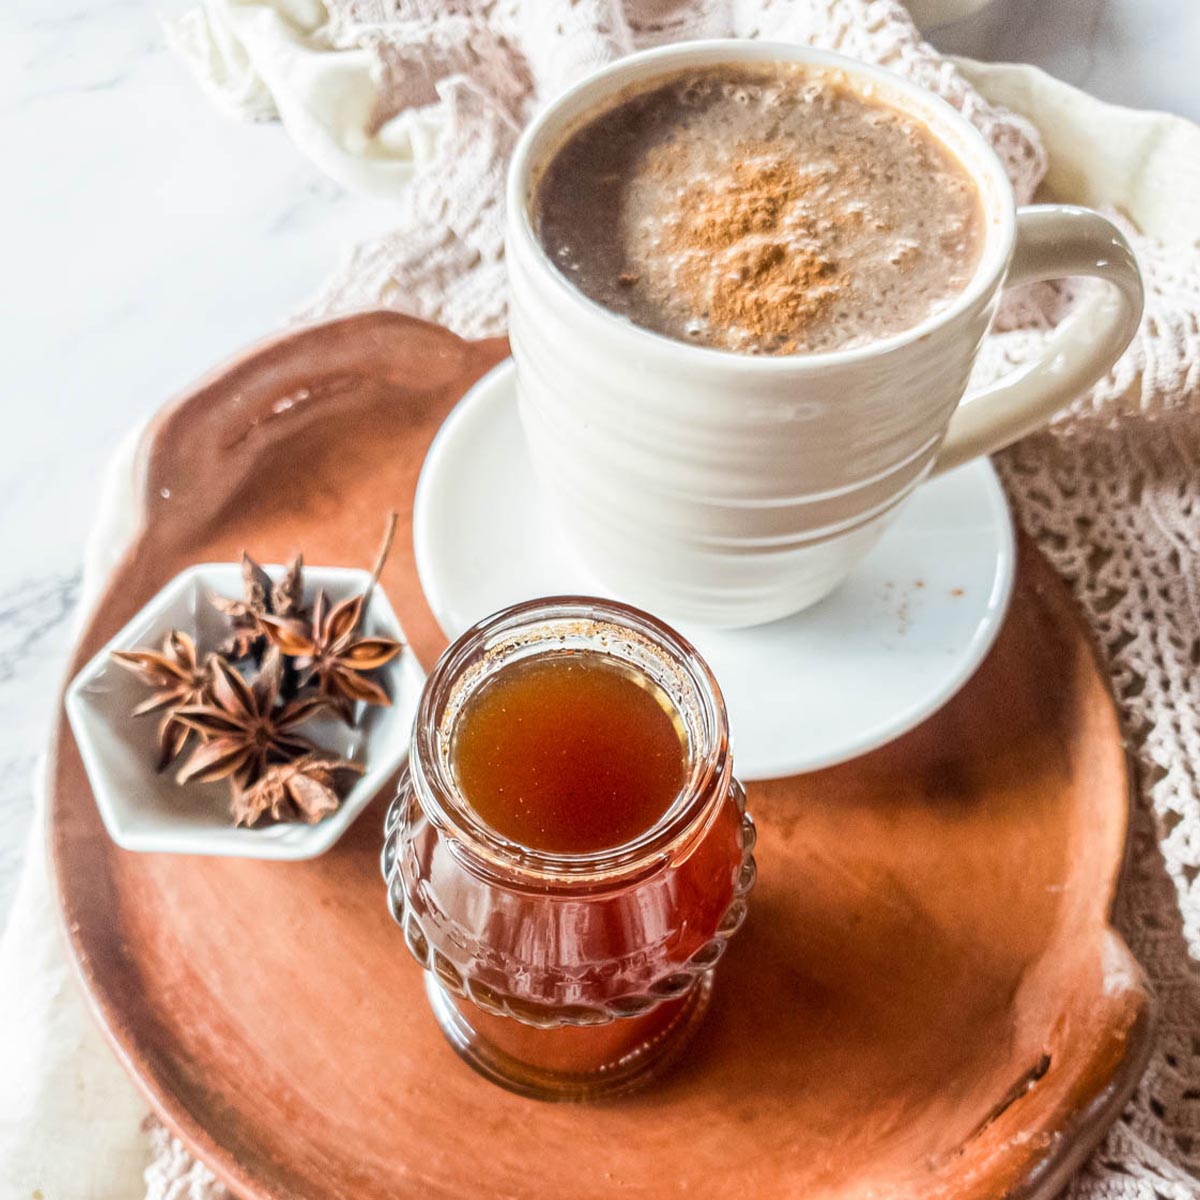
Serve it well-chilled for the cleanest slices. Pair it with pour over coffee or dirty chai tea late for a cozy treat, or go festive with a ginger beer mocktail or apple mimosa alongside it at your next holiday gathering. It’s the kind of make-ahead dessert that follows a holiday ham dinner with cornbread (with Bisquick) and make-ahead mashed potatoes perfectly, since so much can be ready well before guests sit down.
More Special Occasion Desserts To Try
- Sweet puff pastry vol-au-vent
- 3-ingredient cheesecake recipes
- Baked custard
- Pecan pie
- Red wine poached pears
- Lemon angel pie
Biscoff Cheesecake Recipe with Chocolate Variation
Ingredients
For the Crust:
- 2 cups crushed Biscoff cookies divided
- 7 tablespoons unsalted butter melted
For the Filling:
- 16 ounces cream cheese softened
- ½ cup granulated sugar
- ¾ cup Biscoff spread
- 1 teaspoon vanilla extract
- ¾ cup cold heavy cream
- ⅔ cup dark chocolate chips melted (optional)
For the Topping:
- ⅓ cup heavy cream
- 3 tablespoons Biscoff spread
- crushed Biscoff cookies for garnish
- chocolate shavings chocolate shavings
Instructions
- Mix the crushed Biscoff cookies with the melted butter.

- Tress the mixture firmly into the bottom of a 9-inch (23 cm) springform pan. Pop it in the fridge while you make the filling.
- Beat the cream cheese and sugar together until smooth. Add the Biscoff spread and vanilla, then mix until it's all combined.
- In another bowl, whip the heavy cream to soft peaks, then gently fold it into the cream cheese mixture. Going for the chocolate version? Fold in the melted chocolate now too.
- Layer the filling in two parts over the chilled crust: spread half the filling, sprinkle on the remaining cup of cookie crumbs, then spread the rest of the filling on top.
- Smooth it out and refrigerate for at least 6 hours (overnight is even better) until it's fully set.
- Warm the heavy cream and Biscoff spread together in a saucepan or microwave until smooth. Let it cool a bit before pouring it over the chilled cheesecake.
- Finish with crushed Biscoff cookies and chocolate shavings on top. Slice it up and serve cold.