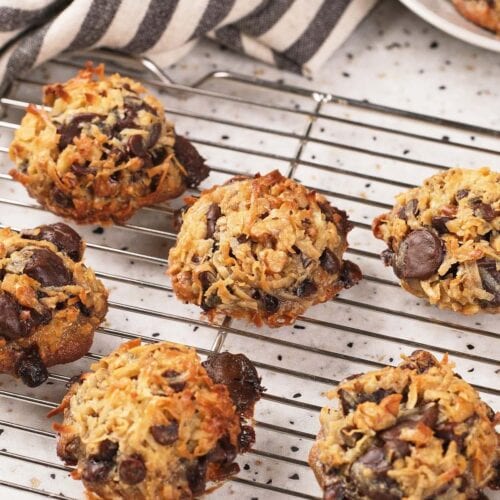
Magic Cookies
As a participant in the Amazon Services LLC Associates Program and other affiliate programs, Easy Homemade Life may collect a share of sales or other compensation from the links on this page. This comes at no additional cost to you, and all the prices and availability are accurate at the time of publishing.

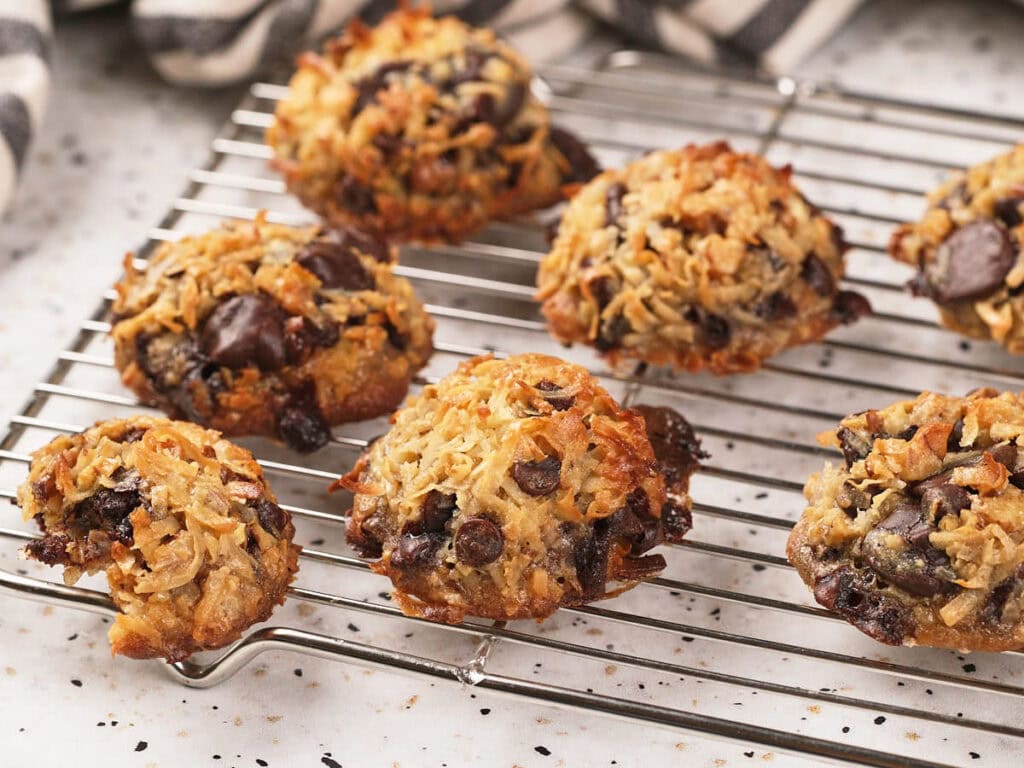
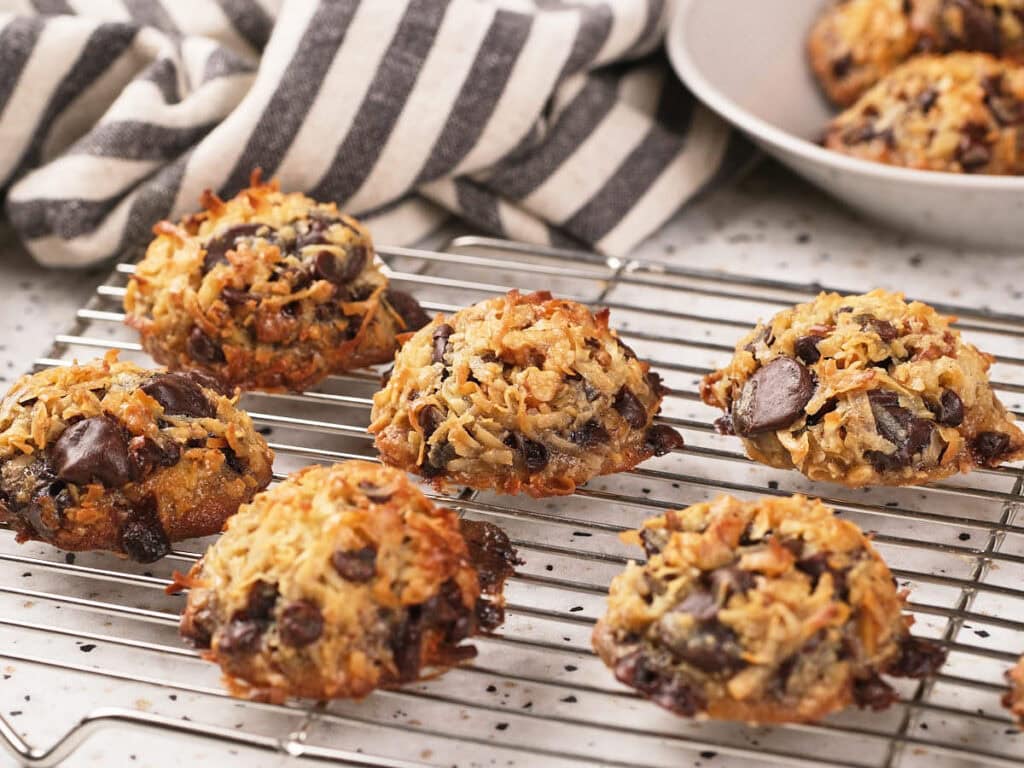
Growing up, magic cookie bars were one of those treats I always looked forward to with a sweet, chewy combination of coconut, chocolate, and crunch. When I started developing my own version as a flourless cookie, I wanted to keep everything that made the original so good while stripping out the graham cracker base and sweetened condensed milk. The result is something lighter, simpler, and honestly just as satisfying, less of a guilty pleasure and more of just a pleasure.
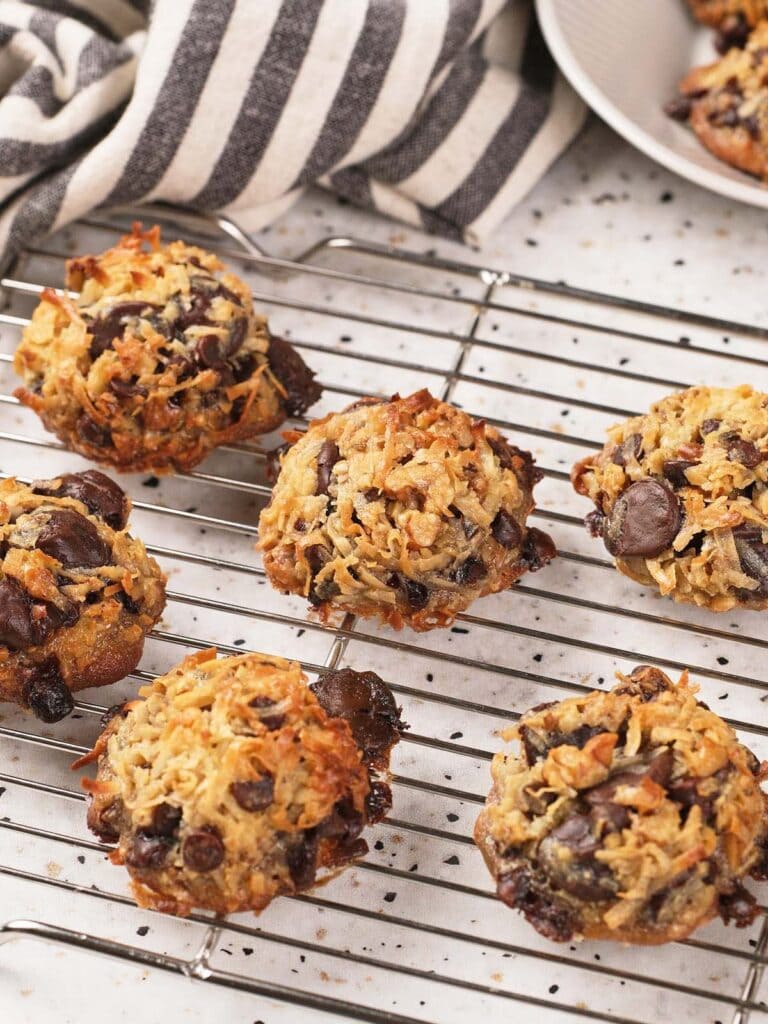
I will admit I was a little apprehensive the first time I pulled a batch out of the oven. Adapting a beloved childhood recipe always comes with some risk. But one bite was all the reassurance I needed. The chewy center, the crisp edges, the coconut and chocolate chip combination, it was all there.
Between chocolate chip cookies, hot chocolate cookies, matcha sugar cookies, and dirty chai earthquake cookies, my cookie jar is rarely empty. But these flourless magic cookies are the ones that get requested by name, and at this point, that is really all the review they need.
Because these cookies are naturally gluten-free, I never have to think twice about bringing them to potlucks or sharing them with my kids’ friends who have dietary restrictions. That kind of flexibility matters a lot to me.
Why You’ll Love This Recipe
- With a short bake time, you’ll be enjoying fresh cookies straight from the oven in 10 minutes or less.
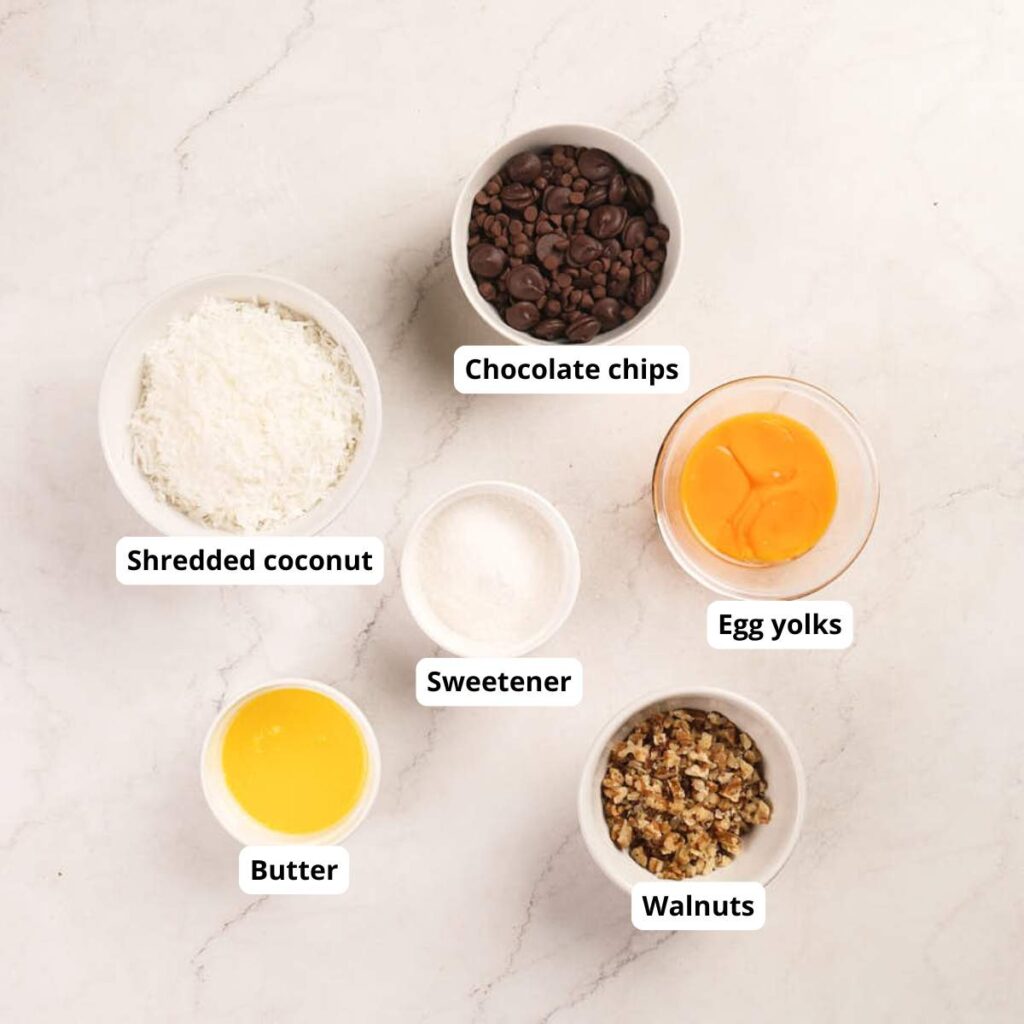
- All you need are 6 simple ingredients.
- Enjoy the perfect balance of chewy, gooey, and crunchy textures that will keep you reaching for more.
- Whether it’s a cozy night in, a party treat, or a school bake sale, these cookies are always a crowd-pleaser.
How to Make Magic Cookies
They’re called “magic cookies” because of the way they come together from seemingly simple ingredients to become something amazing. And I know everyone will agree that the “magic” also refers to how easy they are to make. If you like magic bars, guaranteed you’ll like these cookies, too.
Scroll to the bottom of this post for a printable recipe card with a full list of ingredients, measurements, and step-by-step instructions.
Ingredient Notes
- Egg yolks: Binds the ingredients together and adds moisture to the dough to create the perfect chewy texture.
- Butter: I use melted butter for better incorporation. Forgot to take it out of the fridge? Learn how to soften butter so you can melt it quicker!
- Shredded coconut: I use unsweetened shredded coconut. For an extra burst of coconut flavor, consider toasting the shredded coconut before mixing it into the dough.
- Chocolate chips: Use whatever chocolate chips you like. Milk, white, dark chocolate chips, or a combination of multiple types.
- Walnuts: Adds a delightful crunch to the cookies! Chopped pecans, almonds, cashews, and macadamia nuts are ideal substitutes.
If you want to customize the flavor more, add a splash of vanilla extract, a pinch of cinnamon, or even a bit of orange zest to give your magic cookies a little boost.
Step-By-Step Instructions
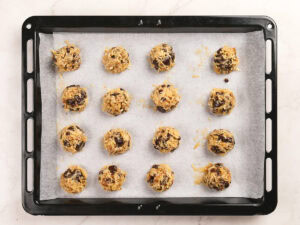
These cookies are a no-fuss, all-flavor sweet treat that’s so easy even kids can make them. The hardest part is waiting for the dough to chill, but it’s important so the dough can firm up and not spread too much during baking, resulting in chewier, more flavorful cookies. Follow the 3 simple steps below to start making the magic cookies of your dreams.
- Mix the batter together.
- Let it chill in the fridge.
- Bake until the edges are golden.
- Let them cool down before serving.
Expert Tips
- Your cookies are only as good as the ingredients you use! Use real chocolate chips or chunks for maximum flavor. Trust me, you’ll be able to taste the difference.
- Bake the cookies just until they’re set around the edges. They may seem soft when you take them out of the oven, but they will firm up as they cool. Overbaking will dry out the cookies, and you will lose their soft, chewy texture.
- A cookie scoop is definitely one of the handiest kitchen gadgets, especially if you love to bake. For uniform cookies that bake evenly, use a cookie scoop to portion out the dough.
How to Store This Recipe
Place cookies in an airtight container or ziploc bag and store at room temperature for up to 5 days, in the freezer for up to 1 month. Enjoy them straight out of the fridge or let them come to room temperature before consuming.
What to Serve with Magic Cookies
Magic cookies make an excellent snack, lunchbox treat, or after-dinner dessert. I often bring it to picnics, too! Pair them with your favorite hot or cold drinks – they’re delicious with milk, hot chocolate, coffee, or tea. From a cold brew coffee to a warm cup of matcha tea, these cookies taste like magic whatever you pair them with!
More Easy Dessert Recipes To Try
- Peanut butter brownies from mix
- Peach cobbler with cake mix
- Butterscotch brownies
- Chocolate fudge cake
6-Ingredient Magic Cookies Recipe
Ingredients
- 4 large egg yolks
- ¼ cup butter melted
- ⅓ cup sugar
- 1 cup shredded coconut unsweetened
- 1 cup chocolate chips
- ⅔ cup chopped walnuts
Instructions
- Preheat the oven to 350 °F.
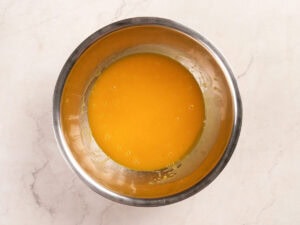
- Add the egg yolks and melted butter to a mixing bowl and whisk together.

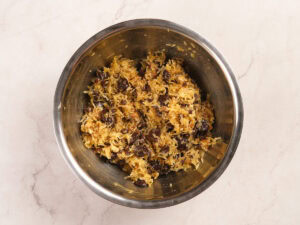
- Dump in the remaining dry ingredients and stir gently until well combined.
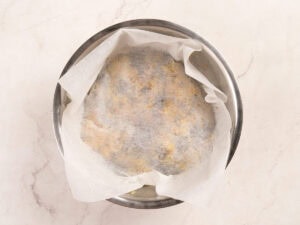
- Cover the bowl and chill the batter for at least 30 minutes until the batter is firm enough to scoop.
- Use a cookie scoop or heaping tablespoon to make approximately 20 round balls. Arrange each one evenly on a parchment paper-lined cookie sheet. Bake for 8 to 10 minutes, until the edges are golden-brown.
- Remove from the sheet and place on a cooling rack to cool. If they are too soft to remove from the sheet upon taking them out from the oven, return back to the oven for another minute or two.


worst cookie ever threw out the whole batch too much yolk taste they were a odd yellow color just horrible do not waste good ingredients on these and I bake every day
I’m sorry to hear these cookies didn’t turn out the way you hoped, Cheri. I know how disappointing that can be, especially when you bake often. I’ve never had issues when making these cookies, but I appreciate your honest feedback. Thank you for giving it a try!